
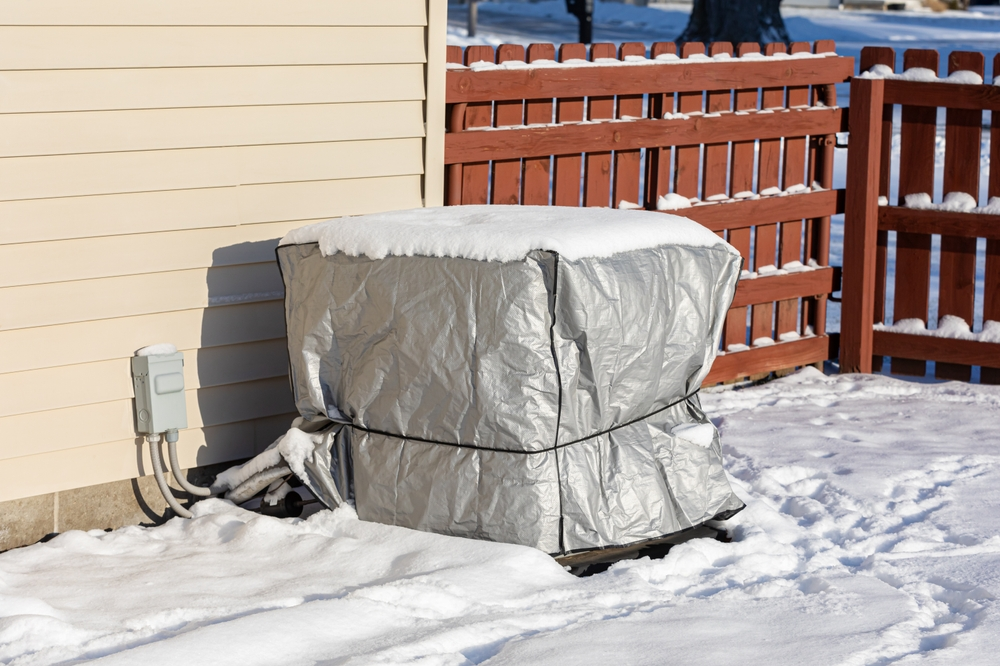

Most Canadians switch the thermostat from cool to heat sometime in the fall and forget about the air conditioner until the first hot day of summer. Meanwhile, the outdoor unit sits in the yard through months of snow, freezing rain, falling ice and freeze-thaw cycles.
The good news is that the job takes about an hour. When you winterize air conditioner units before the first frost, you protect the coils, fan and compressor from the worst of the season. You also lower the odds of a costly repair call when summer returns.
Many of the AC problems that show up in spring actually start in the fall. Think bent fins from falling ice, mouse nests inside the cabinet, and units that switched on during a mild spell while packed with snow. This guide from 24/7 Emergency Plumber walks Canadian homeowners through the steps that prevent them, plus a few plumbing checks that belong on the same to-do list.
The short version: if you have a central air conditioner, shut off its power, clean it, cover only the top and keep it clear of snow all winter. If you have a heat pump, leave it running. The details are below.
Why Your Air Conditioner Needs Winter Prep in Canada
Outdoor condenser units are built to handle rain and the odd snowfall. A Canadian winter asks a lot more of them. Months of snow cover, ice storms and repeated freezing and thawing all take a toll on a machine that is sitting idle.
Leaves and grass left inside the unit hold moisture against the metal for months, which speeds up rust and corrosion.
Ice and heavy snow sliding off the roof or eavestrough can bend the thin aluminum fins and crack the fan blades.
Mice and other small animals look for sheltered places to nest, and they can chew through wiring and insulation.
If the power stays on and the thermostat is set to Auto, a warm spell can switch on the cooling. Running while ice or snow is packed into the unit can damage it.
When to Winterize: First Frost Timing Across Canada
The best time to winterize is after your last hot day and before the first hard frost. Once you are confident you will not need cooling again until spring, you are ready to start.
That window opens at very different times across the country. According to The Weather Network’s September climate normals, Regina, Saskatoon and Calgary usually see their first frost in the third week of September. Winnipeg and Edmonton follow later in the month.
In Toronto and Montreal, the first frost typically arrives in early October. Atlantic Canada tends to follow in mid to late October, while Vancouver and Victoria often stay frost-free until November.
If the first frost has already passed where you live, you have not missed your chance. The steps below still work any time before heavy snow starts piling up around the unit.
Air Conditioner or Heat Pump? Check Before You Start
Before you winterize air conditioner equipment, confirm that what is sitting in your yard is actually an air conditioner. From the outside, a heat pump looks almost exactly the same. The difference is that a heat pump also heats your home in winter, so it must stay powered on and uncovered.
According to Natural Resources Canada’s heat pump guide, air source heat pumps are the most common type on the Canadian market. Cold climate models can keep heating your home at temperatures as low as -30°C.
Not sure which one you have? If your thermostat has settings such as Aux Heat or Emergency Heat, you most likely have a heat pump. If the outdoor unit runs on cold days while your heat is on, it is a heat pump. Ductless mini-splits in Canadian homes are usually heat pumps too. When in doubt, check the label on the unit or ask the company that installed it.
If you have a heat pump, skip the shutdown and covering steps below and focus on keeping the outdoor unit clear of snow and ice all winter. Our guide to heat pumps for year-round heating and cooling explains how they work.
How to Winterize Air Conditioner Units, Step by Step
For a central air conditioner that only cools, these six steps take about an hour. You will need a garden hose, a soft brush, work gloves and either a breathable top cover or a piece of plywood.
1. Shut Off the Power
Find the outdoor disconnect, a small grey box mounted on the wall near the unit. Pull out the handle or switch it to OFF. Then turn off the air conditioner breaker in your electrical panel, which is usually labelled AC or A/C.
Cutting the power keeps the unit from starting on a warm winter day and makes the rest of the job safe. While you are at it, set your thermostat to Heat rather than Auto. If the disconnect box is rusted, damaged or has exposed wires, leave it alone and call a licensed technician.
2. Clear Away Leaves and Debris
Remove leaves, twigs, grass clippings and seed pods from the top and sides of the unit, and pick out anything you can safely reach through the top grille. Trim back shrubs and plants so there is at least 60 cm of clear space around the cabinet. A clear perimeter also gives mice fewer places to hide.
3. Rinse the Coils Gently
With the power off, use a garden hose on a gentle spray setting to rinse dirt and pollen from the fins on the sides of the unit. Never use a pressure washer. The fins are thin aluminum and bend easily, and flattened fins block airflow next summer.
Let the unit dry completely, ideally for a day or two, before you put anything on top of it. One timing tip from the plumbing side: rinse the AC before you shut off and drain your outdoor faucet for the winter. Otherwise, you will be carrying buckets from the kitchen sink.
4. Inspect the Refrigerant Line Insulation
Two copper lines run from the outdoor unit into your house. The larger one should be wrapped in foam insulation. If the foam is cracked, crumbling or missing, replace it with foam pipe insulation from a hardware store and seal the seams with UV-resistant tape.
Look for oily stains on the lines or at the fittings. Oil around a joint can point to a refrigerant leak, and refrigerant work must be done by a certified technician.
5. Cover the Top, Not the Whole Unit
This is where many homeowners go wrong. Wrapping the entire unit in a plastic tarp or a non-breathable cover traps moisture inside, which can lead to rust and corrosion. It also gives mice a cozy place to spend the winter. Outdoor units are designed to handle rain and snow on their own.
The real danger is falling ice and heavy, wet snow from the roof or eavestrough. Protect the top only, using either a breathable mesh top cover or a piece of plywood slightly larger than the unit, weighed down with a couple of bricks. Leave the sides open so air can circulate. If your manufacturer recommends a specific cover, follow its instructions.
6. Keep It Clear All Winter
Winterizing is not a one-time job. After big snowfalls or freezing rain, check that the plywood or cover is still in place and brush loose snow off the top and sides with a soft broom. Never chip at ice with a shovel or scraper, as you can puncture the coil. If drifting snow or a shovelled snowbank starts to bury the unit, clear it back by hand.
Plumbing Checks to Do While You Winterize Your AC
Your air conditioner is tied into your home’s plumbing in ways most people never notice. And the outdoor faucet you just used to rinse the coils is one of the first things to freeze. Take care of these three checks while you are already working on the AC.
Check the Condensate Line and Pump
In most Canadian homes with central air, the indoor cooling coil sits on top of the furnace. All summer, it pulls moisture out of the air and sends it through a small plastic drain line to a floor drain or a condensate pump. Natural Resources Canada’s heating and cooling maintenance guide lists the condensate drain as a regular check-up item, because a plugged drain can cause water damage in the house.
Make sure the line is not kinked, cracked or clogged with slime. If you have a condensate pump, pour a cup of water into its reservoir and confirm that it switches on and empties. This matters even with the AC off, because a high-efficiency furnace often sends its own condensate through the same line or pump all winter. If any part of the line runs outside or through an unheated garage, it can freeze and back up, so have it rerouted to an indoor drain.
Top Up the Basement Floor Drain
All summer, water from the AC keeps the trap in your floor drain full. When the cooling stops, so does that steady trickle. In homes without a high-efficiency furnace feeding the same drain, the trap can slowly dry out over the winter and let sewer gas into the basement. Pour a litre or two of water into the drain once a month. Our guide to basement floor drain smells covers other causes and fixes.
Shut Off and Drain Your Outdoor Faucets
Once the coils are rinsed, disconnect your garden hose, drain it and store it for the season. Close the indoor shut-off valve that feeds each outdoor faucet, usually found in the basement where the pipe passes through the wall. Then open the outdoor faucet to let the remaining water drain out, and leave it open over the winter.
Frost-free faucets still need the hose removed, because a connected hose traps water inside the valve, where it can freeze and split the pipe. That kind of damage often goes unnoticed until spring, when the faucet is turned on and starts leaking inside the wall. For more ways to protect your home, see our guide to preventing and dealing with frozen pipes.
Window and Portable Air Conditioners
If you cool your home with a window unit, the best move is to take it out before the first frost. Leaving it in lets cold air leak in around the edges all winter. Clean or wash the filter, drain any water, let the unit dry, and store it upright in a dry spot such as the basement or a storage locker.
If the unit has to stay in place, cover the outside with a fitted, weatherproof cover and seal the gaps around the side panels with foam weatherstripping. Condo and apartment residents should check their building’s rules first.
Portable air conditioners are simpler. Drain the water tank completely, clean the filter, remove the window vent kit and close the window tightly. Store the unit upright indoors until summer.
When to Call a Professional
Some of the things you might notice while winterizing are worth a professional look before the snow flies.
Oily residue on the copper lines or fittings can signal a refrigerant leak.
Rust, corrosion or holes in the cabinet mean the unit is aging and may need repair.
Chewed wiring or insulation points to rodents that may already be living inside.
A cracked or sunken concrete pad that leaves the unit tilted can put stress on the refrigerant lines and connections.
Weak cooling at the end of summer, or ice forming on the lines while the AC was running, usually points to a problem that will still be there in spring.
Fall is also the right time to look after the heating side of your system. Natural Resources Canada recommends booking cooling maintenance in the spring and a heating check-up in the fall with a licensed and insured contractor. Our heating services team can inspect your furnace, test the condensate pump and make sure everything is ready before the coldest weeks arrive.
Getting Your AC Ready Again in Spring
When warm weather returns, reverse the process. Remove the plywood or top cover, clear away any debris and check the unit for winter damage. Replace your furnace filter, since the furnace fan also moves the cooled air through your home.
Turn the power back on at the breaker and the outdoor disconnect. Many manufacturers recommend waiting about 24 hours before switching to cooling, which gives the compressor’s crankcase heater time to warm up. Check your owner’s manual for the exact timing. Then set the thermostat to Cool on a warm day and confirm that cold air is coming from the vents.
Spring is also a good time to work through our post-winter plumbing inspection checklist, since outdoor faucets and pipes often reveal winter damage once the weather warms.
Frequently Asked Questions About Winterizing Your AC
Should I cover my air conditioner in winter?
Cover the top only. A breathable top cover or a weighted piece of plywood protects the unit from falling ice and heavy snow. Avoid wrapping the whole unit in plastic, which traps moisture and invites mice to nest inside.
Can I winterize a heat pump the same way?
No. A heat pump heats your home in winter, so it must stay powered on and uncovered. Your job is to keep the outdoor unit clear of snow, ice and debris so air can flow freely around it.
Do ductless mini-splits need to be winterized?
Most ductless mini-splits in Canadian homes are heat pumps. If you use yours for heating, leave it running and keep the outdoor unit clear of snow. If it is a cooling-only model, follow the winter instructions in the owner’s manual.
When is the best time to winterize my AC in Canada?
Ideally after your last hot day and before the first hard frost, and at the latest before the first heavy snowfall. On the Prairies that generally means September, in Ontario and Quebec it means late September or October, and on the BC coast it can stretch into November.
Is it bad to run my air conditioner when it is cold outside?
Yes. Most central air conditioners are not designed to run in cool weather. Running one when it is below about 15°C outside can cause ice to form on the indoor coil and puts extra strain on the compressor. If you want to test it, do it on a warm day before the season ends, or wait until spring.
Need Help Getting Your AC Ready for Winter?
If you would rather leave it to a professional, or you spotted damage while winterizing, our licensed technicians can help. They can inspect the unit, clean the coils and check the condensate line and pump. Learn more about our air conditioning services, or call 289-627-1460 to book a visit.
An hour of work this fall is all it takes to winterize air conditioner units properly. Keep yours clear of snow through the winter, and it will be ready to keep you cool the moment summer comes back.